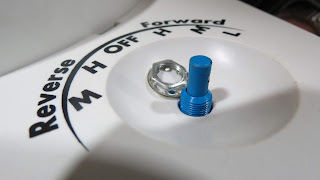
When installing a Vortex Fan do not let the unit hang by the wires, damage will occur to the switch.
Vortex I and Vortex II are 12 volt power only
If you are not aware of your power supply please consult a certified electrician before ordering/installing.
NOTE:
Vortex New Design has a pre-stamped cut-out for a fuse that is required in Canada.
This is not a defect in the housing but the new design by the manufacturer.
When installing a Vortex Fan do not let the unit hang by the wires, damage will occur to the switch.
1. Remove the handle from the vent.
2. Remove the screen from the vent.
3.
Locate the cross bar in the lid of the vent, there will be tabs on both
the top and bottom of the bar you will need to flatten these down.
Be sure to flatten the bottom ones as well.
4. Locate the gears for the fan, you will need to remove the screws on the front side of the fan for the gear box to move.
5. After the screws have been removed you will pull the gear box out and simply move it to the bottom hole.
Remember to replace your screws.
6. Line the gear box and crank gear up, the gears should fit together easily.
7. Don't forget to secure your vent with the screws provided into the outer rim of the Vortex II
8. Last attach the handle.
NOTE:
Vortex New Design has a pre-stamped cut-out for a fuse that is required in Canada.
This is not a defect in the housing but the new design by the manufacturer.
When installing a Vortex Fan do not let the unit hang by the wires, damage will occur to the switch.
Vortex I and Vortex II are 12 volt power only
If you are not aware of your power supply please consult a certified electrician before ordering/installing.
Be sure to remove the set screw
Class A Customs
1130 County Road 6 West
Elkhart, IN 46514


